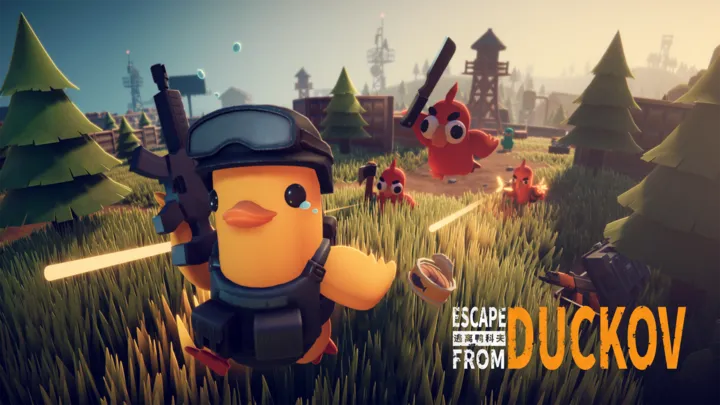
The Quack-Tactical Manifesto: Mastering the Hardcore Streets of Escape from Duckov
The Quack-Tactical Manifesto: Mastering the Hardcore Streets of Escape from Duckov
In the satirical yet brutal world of Escape from Duckov, the stakes are as high as a goose in flight. This avian-themed extraction shooter takes the punishing mechanics of the genre and filters them through a lens of feathered fury. To the uninitiated, it looks like a parody; to the veteran, it is a high-octane simulation of ballistic physics, beak-to-beak combat, and inventory management. Success in Duckov is not measured by your kill count, but by your ability to waddle out of the raid with a backpack full of premium seeds and high-tier breadcrumbs. This guide provides a deep technical dive into the mechanics that define the "Duckov Way," focusing on the granular details of avian anatomy, bread-tier logistics, and the psychological warfare of the pond.
1. Pre-Raid Nesting: The Calculus of the Loadout
Before you deploy into the Shoreline or the Pond, your raid is won in the stash. In Escape from Duckov, the "Weight-to-Waddle" ratio is the most critical metric. Carrying a Tier 5 Kevlar Vest (Feather-Reinforced) might save you from a 9mm pellet, but it will drain your stamina significantly faster, making you a sitting duck—literally. You must balance your "Armor Class" with your "Flight Capability." If your character’s weight exceeds 40% of its capacity, your "Quack" becomes strained, and your wing-beats generate more noise, alerting every hungry predator in the vicinity.
The technical secret to a successful loadout lies in "Magazine Management." Unlike traditional shooters, Duckov requires you to manually load shells or seeds into your magazines. A pro-tier strategy involves "Tracer-Staggering." By loading a tracer round every third shot, you can track your lead on flying targets without exhausting your entire supply of high-penetration "Steel-Tip Seeds." This is especially vital when using the Remington 870-Duck Edition, where every shot counts due to the slow pump animation.
2. Ballistic Bread: Understanding Caliber and Crust Penetration
In the world of Duckov, ammunition is king. The game features a complex "Crust-Penetration" system that dictates how well a projectile passes through various armor tiers. Standard "White Bread" rounds are cheap and have high flesh damage but will shatter against even a Tier 2 "Stale Sourdough" vest. For high-tier PMC (Plucky Member of the Colony) encounters, you must invest in "Rye-Hardened" or "Pumpernickel" armor-piercing rounds. These rounds have a lower base damage but ignore the damage reduction of top-tier protective gear.
Ammunition Performance Matrix
- White Bread (HP): Maximum damage to unarmored wings. Ideal for "Leg Meta" (or Wing Meta) tactics where you aim for the extremities to slow the enemy down.
- Whole Wheat (Ball): The standard balanced round. Reliable but outclassed in late-game scenarios.
- Pumpernickel (AP): Low damage, extreme penetration. This is what you use to headshot "Giga-Ducks" wearing ballistic helmets.
- Seeded Sourdough: A unique fragmenting round that causes a "Bleeding" status effect, forcing the enemy to use a "Band-Aid" or "Gauze" within 30 seconds or face total HP depletion.
3. The Art of the Waddle: Sound Cues and Ground Friction
Sound in Escape from Duckov is binaural and highly sensitive. Every surface—from the muddy riverbanks to the gravel paths of the "Park" map—has a unique "Decibel Signature." Walking on dry leaves produces a high-pitched crunch that can be heard up to 40 meters away, while waddling through water creates a low-frequency splash that carries further but is harder to pinpoint. Advanced players utilize "Sneak-Waddling" (default Left Ctrl) to minimize their sound radius, but this consumes "Calf Stamina" over time.
To dominate the auditory landscape, you must invest in "Tactical Ear-Flaps." These headsets amplify the sound of distant quacks and approaching webbed footsteps while suppressing the deafening boom of "Feather-Grenades." A technical tip for solo players is "Sound-Baiting": throwing a "Decoy Crumb" into a metal shed to draw an enemy’s attention, then circling around their flank while they are distracted by the metallic clatter. In Duckov, if you hear the enemy first, you have already won 70% of the fight.
4. Avian Physiology: Managing the "Red-Beak" Status
The health system in Duckov is segmented into different body parts: Head, Thorax, Stomach, Left Wing, Right Wing, and Legs. If your Thorax or Head hits zero HP, you are "Cooked." However, losing a wing is not the end of the world—it just prevents you from using "Tactical Flight" and increases your weapon sway by 60%. The "Stomach" is perhaps the most dangerous part to have "Blacked Out" (destroyed), as it leads to rapid dehydration and energy loss, requiring you to consume "Canned Corn" or "Sparkling Pond Water" every 2 minutes to stay conscious.
Emergency Medical Protocol
- The Splint: Use this immediately if a wing or leg is fractured to regain 80% of your movement speed.
- The "Golden Egg" Stimulant: This high-tier injector removes all pain effects for 180 seconds, allowing you to sprint even with destroyed limbs. Use this during your final dash to the extraction point.
- The Surgical Kit: Essential for long raids. This allows you to restore "Blacked Out" body parts to 1 HP, though it reduces their maximum HP for the remainder of the raid.
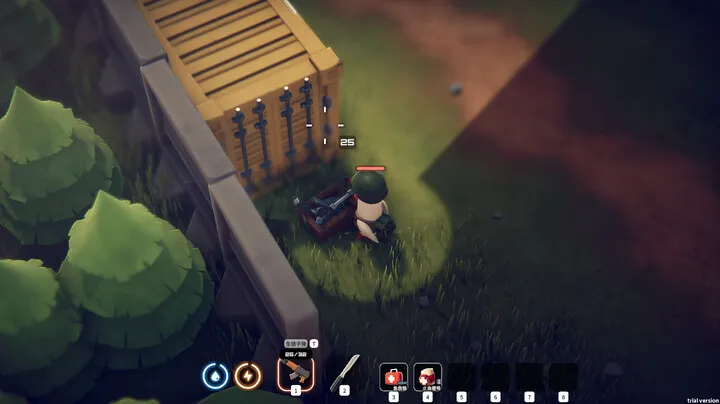
5. Loot Density: The "Crumb-per-Slot" Economics
Inventory management in Duckov is a Tetris-style puzzle that separates the wealthy geese from the starving sparrows. To maximize your profit, you must think in "Value per Slot." A "Golden Duck Statue" might look impressive, but it takes up 4 slots (2x2). If its market value is 20,000 crumbs, its value is 5,000 crumbs per slot. Conversely, a "High-End Bolt" takes up 1 slot and sells for 8,000 crumbs. Always prioritize dense technical loot over large, flashy items unless you have a "Scavenger Backpack."
High-Value Loot Hierarchy
- Electronic Components: CPUs, Motherboards, and Wires are the backbone of the "Hideout" upgrades and always hold high value.
- Key-Cards: These take up 1 slot and grant access to high-tier loot rooms in "The Lab." A single Blue Key-Card can fund your next 20 raids.
- Condensed Milk: A bizarrely high-value food item that is often used in trades for high-tier armor.
- Scopes and Silencers: If you find a "Vudu" or "Razor" scope, strip it from the enemy’s gun. The scope is often worth more than the rifle itself.
6. Map Mastery: The Extraction "Gate-Keep" Strategy
In Escape from Duckov, the raid isn't over until the extraction timer hits zero. Every map has "Fixed Extractions" and "Chance Extractions." The "Crossroads" exit on the Customs Pond map is a notorious "Choke Point." To extract safely, you must perform an "Extraction Scan"—checking the nearby bushes and rooftops for "Exit Campers." These are players who wait near the extract to kill heavily geared ducks at their most vulnerable.
A technical counter to campers is the "Smoke-Waddle." By deploying a M34 White Smoke Grenade, you create a visual barrier that prevents campers from lining up a headshot. Furthermore, always utilize "Cover-to-Cover" movement. Never sprint directly to the extract in an open line; move between trees, rocks, and abandoned bread-trucks. If you have "Green Flare" extraction active, ensure you fire the flare into the "Signal Zone" before entering, or the AI-Sniper-Owls will pick you off instantly.
7. The Scav-Goose Run: Risk-Free Resource Gathering
Playing as a "Scav-Goose" is the best way to recover from a "Broke-Bird" status. As a Scav, you spawn with random gear and neutral AI status with other ducks on the map. The goal of a Scav run is not to hunt PMCs, but to "Vacuum" the remaining loot. You should focus on "Dead-Body Containers" and "Hidden Stashes" (buried barrels) that PMCs often miss during their high-speed firefights.
The "Scav-Karma" System: If you kill other Scavs, your reputation with "The Fence" (the black-market dealer) will drop. High karma leads to faster Scav cooldowns and better starting gear (like spawning with a Lab Key-Card in your pocket). To increase karma, help other Scavs kill "Rogue Geese" or use the "Joint Extraction" points where a PMC and a Scav must exit together. This is a rare moment of avian peace that rewards both players with a massive loot drop from the Fence.
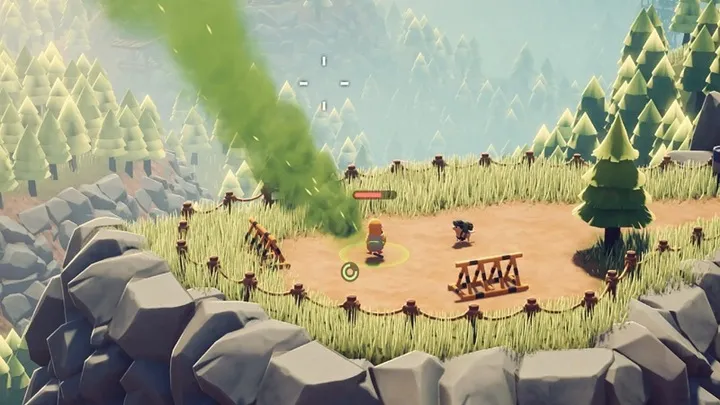
8. Tactical Flight: Managing Verticality and Wing Stamina
Unlike other shooters, Escape from Duckov features a limited "Flight Mechanic." This isn't full flight like a flight simulator, but a "Power-Jump" that allows you to reach rooftops or clear fences. This consumes "Wing Stamina" (the blue bar). If your wing stamina is depleted, your aim will be incredibly shaky for 10 seconds. Technical players use flight for "Vertical Flanking"—jumping onto a shipping container to get an angle on an enemy hiding behind a wall.
Flight Combat Tips
- The "Drop-Quack": Falling from a height while firing. The game’s recoil is actually reduced during the first 0.5 seconds of a fall, allowing for an incredibly accurate "Air-to-Ground" strike.
- Roof-Sitting: Holding a rooftop provides a 360-degree FOV, but you are silhouetted against the sky. Always stay prone when not firing to minimize your profile.
- Feather-Dashing: A mid-air dash that can be used to dodge incoming sniper fire. It requires a "Full Stamina" bar and should only be used in life-or-death situations.
9. Hideout Engineering: Building the Ultimate Pond Base
Between raids, you spend your time in the "Hideout." This is a customizable bunker that provides passive bonuses to your character. The "Intelligence Center" reduces Scav cooldowns, while the "Water Collector" produces purified water that can be sold or used to craft "Moonshine" (a high-value trade item). Upgrading the Hideout requires specific "Technical Parts" found in raids, such as "Electric Drills" and "Corrugated Pipes."
The most important Hideout module is the "Bitcoin Farm." By installing Graphics Cards (GPUs) into the farm, you generate a passive income of "Duck-Coins" every few hours. These coins can be traded to the "Mechanic" dealer for high-tier weapon parts. In the late-game, a fully maxed-out Bitcoin Farm allows you to run "Thermal Scopes" and "Tier 6 Armor" every single raid without worrying about your crumb balance. It turns the game from a survival struggle into a dominant power-trip.
10. The Psychological Game: Dealing with "Gear Fear"
The biggest obstacle in Escape from Duckov is not the AI or the other players—it is "Gear Fear." This is the anxiety of losing your best equipment. The technical solution to Gear Fear is "Standardization." Instead of having one "Super-Kit" that you are afraid to use, build ten "Budget-Kits" that are identical. This builds muscle memory with a specific weapon's recoil and reload speed. When you die, you simply equip the next identical kit and go again.
Remember the "Golden Rule of Duckov": The gear in your stash is not yours; it is just your turn to use it. Every item has a lifecycle. Use your best gear to increase your survival rate, which in turn leads to more loot. A Tier 6 helmet is useless if it sits in your nest forever. Take it into the raid, trust your training, and remember that even if you lose it all, the pond always provides for a persistent duck.
Conclusion
Escape from Duckov is a masterpiece of high-tension gameplay hidden behind a whimsical exterior. It demands respect for its systems—from the nuances of bread-based ballistics to the grueling economics of the stash. By mastering the auditory cues of the environment, the physiological needs of your avian operator, and the strategic depths of the Hideout, you transform from a target into a predator. The streets of Duckov are cold, and the bread is often stale, but for the duck who can navigate the chaos, the rewards are legendary. Keep your feathers dry, your beak shut, and your eyes on the extraction point. We’ll see you at the pond.